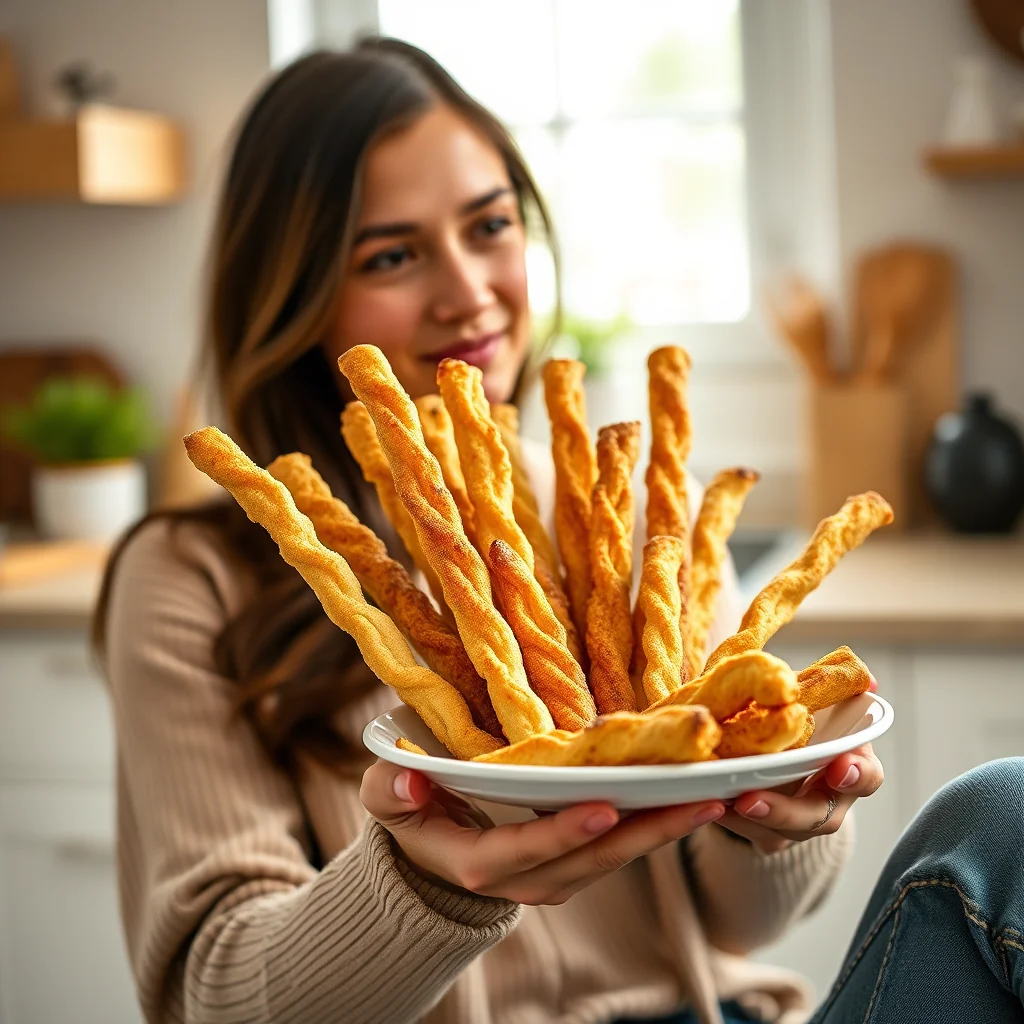
Italian grissini — those impossibly crisp, paper-thin breadsticks from Turin — are more achievable at home than people think: a slow olive-oil dough, rolled thin, dusted with semolina, and baked until it snaps. The recipe takes most of a day, but your hands are only busy for forty minutes of it.
There’s something incredibly satisfying about the crisp, audible *snap* of a perfect breadstick. Forget the soft, doughy versions; we’re talking about authentic Italian *grissini*. Originating from Piedmont, these slender, crunchy batons are a testament to the beauty of simple ingredients. Whether you prefer them elegantly uniform or charmingly rustic and crooked, this recipe is your guide to creating an irresistible batch. They’re perfect for dipping, wrapping in prosciutto, or simply munching on their own. Let’s get baking!
Ingredients
• 3 cups / 360g (12.7 oz) all-purpose or bread flour
• 2 teaspoons / 7g (0.25 oz) instant yeast
• 1 teaspoon / 4g (0.14 oz) sugar
• 2 teaspoons / 12g (0.42 oz) salt
• 2 tablespoons / 30ml extra virgin olive oil, plus more for brushing
• 1 cup / 240ml warm water, plus more as needed
• 1/2 cup / 85g (3 oz) semolina flour or cornmeal, for dusting
Instructions
1. In a food processor, combine the flour, instant yeast, sugar, and salt. Pulse once or twice to mix. Add the 2 tablespoons (30 ml / 1 fl oz) of olive oil and pulse again.
2. With the machine running, slowly stream in 1 cup (240 ml) of warm water. Continue adding water, a tablespoon at a time, until the dough comes together in a shaggy, sticky ball.
3. Lightly oil a medium bowl. Transfer the dough to the bowl, turning it to coat in the oil. Cover with plastic wrap and let it rise in a warm spot for 1 hour.
4. After the first rise, gently reshape the dough into a ball, return it to the bowl, cover, and refrigerate for at least a few hours, or preferably overnight. This slow, cold fermentation develops incredible flavor.
5. When ready to bake, preheat your oven to 400°F / 200°C. Lightly grease two baking sheets with olive oil and sprinkle them with the semolina flour or cornmeal.
6. Divide the chilled dough into 3 pieces. Working with one piece at a time (keep the others covered), roll it out as thinly as possible on a well-floured surface. Use a sharp knife or a pastry wheel to cut the dough into 1/4-inch thick strips.
7. Carefully transfer the strips to your prepared baking sheets, leaving a little space between each one. Lightly brush the tops with more olive oil and sprinkle with sea salt or seeds, if desired.
8. Bake for 10 to 20 minutes, or until the breadsticks are a deep golden brown and completely crisp. Let them cool completely on a wire rack before serving. Store in an airtight container for up to a week.
Nutritional Information
• Serving Size: 5 breadsticks
• Calories: 120
• Carbohydrates: 20g
• Protein: 3g
• Fat: 3g
• Sodium: 250mg
Pro Tips
• For the perfect snap, roll the dough as thinly as you can. The bake time will vary depending on thickness, so watch for a deep golden-brown color to ensure they are fully crisp.
• Infuse your dough with flavor by adding 2 teaspoons (10 ml / 0.3 fl oz) of fresh herbs (like rosemary or thyme), 3/4 cup (960 ml) of grated Parmesan, or 1/2 cup (480 ml) of puréed olives or sun-dried tomatoes along with the dry .
• For a rustic, hand-rolled look, gently roll each strip on the counter to make it long and crooked. For uniform, professional-looking grissini, use a pasta machine’s fettuccine cutter.
• Don’t skip the cold rise! Refrigerating the dough overnight is the secret to a deeper, more complex flavor in your finished breadsticks.
FAQ
Q: Can I make this grissini recipe vegan
A: Yes, this recipe is easily made vegan. The core ingredients—flour, yeast, salt, sugar, olive oil, and water—are all plant-based. Just ensure you use a vegan-friendly sugar, as some are processed with bone char.
Q: What are some vegetarian-friendly pairings for these grissini
A: These grissini are perfect for vegetarian pairings. Serve them with dips like hummus, olive tapenade, or a white bean and rosemary dip. They are also a fantastic addition to a vegetarian charcuterie board with various cheeses, olives, and fruits, instead of the suggested prosciutto.
Q: Is the Parmesan cheese variation vegetarian
A: Traditional Parmesan cheese (Parmigiano-Reggiano) is not vegetarian because it uses animal rennet. To create a vegetarian version, use a hard cheese specifically labeled ‘vegetarian’ or one made with microbial or vegetable rennet, which are widely available in most supermarkets.
Q: How do I store homemade grissini to keep them crispy
A: To maintain that perfect snap, allow the grissini to cool completely on a wire rack after baking. Once cool, store them in an airtight container at room temperature for up to one week. If they lose any crispness, you can refresh them in a hot oven for 2-3 minutes.
More Recipes You’ll Love
- Jamaican Jerk Tofu Skewers
- Mooli ki Sabzi (North Indian Radish Stir-fry)
- Vegetarian Portobello Muffuletta Sandwich
Authentic Italian Grissini (Crispy Breadsticks)
Ingredients
Method
- In a food processor, combine the flour, instant yeast, sugar, and salt. Pulse once or twice to mix.
- Add the 2 tablespoons (30 ml / 1 fl oz) of olive oil and pulse again.
- With the machine running, slowly stream in 1 cup (240 ml) of warm water.
- Continue adding water, a tablespoon at a time, until the dough comes together in a shaggy, sticky ball.
- Lightly oil a medium bowl.
- Transfer the dough to the bowl, turning it to coat in the oil.
- Cover with plastic wrap and let it rise in a warm spot for 1 hour.
- After the first rise, gently reshape the dough into a ball, return it to the bowl, cover, and refrigerate for at least a few hours, or preferably overnight. This slow, cold fermentation develops incredible flavor.
- When ready to bake, preheat your oven to 400°F / 200°C. Lightly grease two baking sheets with olive oil and sprinkle them with the semolina flour or cornmeal.
- Divide the chilled dough into 3 pieces.
- Working with one piece at a time (keep the others covered), roll it out as thinly as possible on a well-floured surface. Use a sharp knife or a pastry wheel to cut the dough into 1/4-inch thick strips.
- Carefully transfer the strips to your prepared baking sheets, leaving a little space between each one. Lightly brush the tops with more olive oil and sprinkle with sea salt or seeds, if desired.
- Bake for 10 to 20 minutes, or until the breadsticks are a deep golden brown and completely crisp.
- Let them cool completely on a wire rack before serving. Store in an airtight container for up to a week.
- Don't skip the cold rise! Refrigerating the dough overnight is the secret to a deeper, more complex flavor in your finished breadsticks.