There’s nothing quite like the magic of tearing into a perfectly cooked paratha. That satisfying crackle gives way to soft, steamy layers, each one infused with the rich, nutty aroma of ghee. It’s the kind of comfort food that warms you from the inside out. Forget dense, tough flatbreads; this recipe is your key to creating those iconic, shatteringly crisp, and wonderfully flaky parathas right in your own kitchen. Get ready to master a true classic!
Ingredients
• For the Dough
• 2.33 cups / 10.76 oz / 305 g sieved chapati flour OR 1.33 cups / 5.82 oz / 165 g whole wheat flour mixed with 1 cup / 4.23 oz / 120 g unbleached white flour
• 0.75 teaspoon / 3.5 ml salt
• 2 tablespoons / 1 fl oz / 30 ml melted butter, ghee, or oil
• 0.67 cup / 5.4 fl oz / 160 ml warm water, about 100°F / 38°C, plus more as needed
• For Cooking and Rolling
• 0.5 cup / 4 fl oz / 120 ml melted ghee or vegetable oil
• Extra chapati or sieved wheat flour for dusting
Instructions
1. Step 1: Make and Rest the Dough
2. In a large bowl, whisk together the flour and salt. Drizzle in the 2 tablespoons / 30 ml of melted ghee or oil. Using your fingertips, rub the ghee into the flour until the mixture resembles coarse breadcrumbs.
3. Gradually add the warm water, mixing until a medium-stiff dough forms. The exact amount of water can vary depending on your flour, so add the last bit slowly.
4. Turn the dough out onto a lightly floured surface and knead for about 10 minutes. You’re looking for a silky smooth and pliable texture.
5. Shape the dough into a ball, lightly coat it with ghee or oil, and place it in the bowl. Cover with an inverted bowl or a damp cloth and let it rest at room temperature for at least 30 minutes, or up to 3 hours. This resting period is crucial for a soft, easy-to-roll dough.
6. Step 2: Divide and Shape the Parathas
7. After resting, briefly knead the dough again and divide it into 10 equal portions. Roll each portion into a smooth ball and keep them covered with a damp cloth to prevent them from drying out.
8. Take one ball of dough and flatten it into a 2-inch / 5 cm disc. Lightly coat both sides in your dusting flour.
9. Roll the disc into a thin, 6-inch / 15 cm circle. Don’t worry about it being perfectly round!
10. Brush the entire surface of the circle with a thin layer of melted ghee. Fold it in half to create a semi-circle.
11. Brush the top of the semi-circle with more ghee and fold it in half again, forming a triangle shape. This folding and layering is the secret to flaky parathas.
12. Lightly dust the triangle with flour and roll it out evenly, maintaining the triangular shape, until it’s about 6 inches / 15 cm on the longest side.
13. Place the shaped paratha on a plate or baking sheet lined with wax paper. Repeat with the remaining dough balls, making sure they don’t overlap. Keep them covered with a damp cloth.
14. Step 3: Cook to Golden Perfection
15. Heat a tawa or griddle over moderate heat for 2-3 minutes. It should be hot but not smoking. Lightly grease the surface with a bit of ghee.
16. Gently place one paratha onto the hot griddle. Cook for about 90 seconds, until you see small bubbles start to form.
17. Flip the paratha. Drizzle about 1 teaspoon of ghee over the top surface and around the edges. Cook for another minute, or until the bottom has beautiful reddish-brown spots.
18. Flip it one last time. Drizzle another teaspoon of ghee on the new top surface. Gently press down on the paratha with a spatula or the back of a spoon in a circular motion. This encourages it to puff up and cook evenly.
19. Cook for another 1-2 minutes until both sides are crisp and dotted with golden-brown spots.
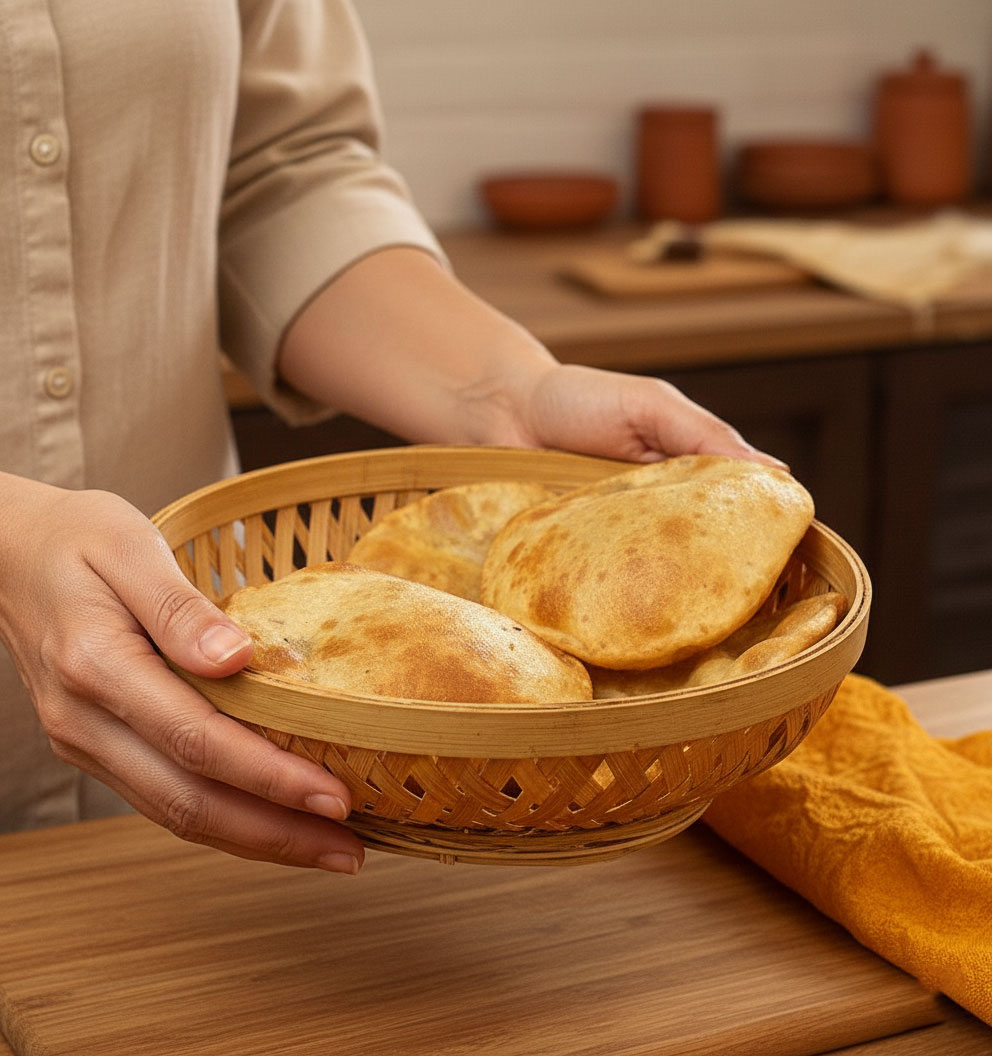
20. Transfer the cooked paratha to a cloth-lined basket or container. This keeps them warm and soft. Repeat with the remaining parathas, adding a little ghee to the griddle as needed.
Nutritional Information
• (per paratha, approximate)
• Calories: 210 kcal
• Carbohydrates: 25 g
• Protein: 4 g
• Fat: 11 g
• Sodium: 180 mg
• Fiber: 3 g
Pro Tips
• Don’t skip the rest! Letting the dough rest for at least 30 minutes relaxes the gluten, making it much easier to roll out thinly without it springing back. A longer rest yields an even softer dough.
• Be generous with the ghee during folding. The layers of fat between the layers of dough are what create the steam that separates them during cooking, resulting in that signature flakiness.
• Maintain the right heat. A griddle that’s too hot will burn the outside before the inside cooks. Too low, and the paratha will become hard and dry. A steady, moderate heat is perfect for a crisp exterior and soft interior.
• Press gently as you cook. After the final flip, use a spatula to gently press down on the surface of the paratha. This helps it puff up beautifully and ensures all the layers cook through.
• Keep them soft. Immediately transfer cooked parathas to a container lined with a clean kitchen towel. Stacking them and keeping them covered traps the steam, ensuring they stay wonderfully soft until you’re ready to serve.
FAQ
Q: Can I make this paratha recipe vegan
A: Yes, absolutely. To make this recipe vegan, simply substitute the ghee or butter with a high-quality vegetable oil or a vegan butter alternative. Use it for the dough, for layering during the folding process, and for cooking on the griddle. The results will be just as flaky and delicious.
Q: What are some vegetarian dishes to serve with paratha
A: Parathas are incredibly versatile. For a hearty vegetarian meal, serve them with dal makhani, chana masala, or a mixed vegetable curry. They are also wonderful with simple sides like a bowl of plain yogurt (dahi), a tangy pickle (achar), or a fresh raita.
Q: How do I store and reheat leftover parathas
A: Let the parathas cool completely, then stack them with parchment paper in between. Store them in an airtight container in the refrigerator for up to 3 days. To reheat, place them on a hot, dry tawa or griddle for about 30-60 seconds per side until warm and soft again.
Q: Can I use only whole wheat flour for this recipe
A: Yes, you can use 100% whole wheat flour (chapati flour/atta). The parathas will have a nuttier flavor and a slightly denser texture. You may need to add a little extra warm water as whole wheat flour absorbs more liquid. The 30-minute resting step is crucial to ensure the dough becomes soft and easy to roll.