There’s nothing quite like the magic of a phulka puffing up into a perfect, steam-filled balloon. These delicate, paper-thin whole wheat flatbreads are a cornerstone of Indian home cooking, turning any meal into a comforting feast. Softer and lighter than their cousin, the chapati, phulkas are all about that incredible, airy texture. While they might seem intimidating, this recipe breaks down every step, from kneading the silky dough to that satisfying moment over the flame. Get ready to fill your kitchen with the warm, nutty aroma of freshly made bread and serve up a stack of these beauties with your favorite dal or curry!
Ingredients
• 2.25 cups / 295 g chapati flour (atta), plus more for dusting
• 1 teaspoon / 5 ml salt (optional)
• 1.5 tablespoons / 22 ml melted butter or ghee, plus more for brushing
• ⅔ cup / 160 ml warm water, or as needed
Instructions
1. Make the Dough: In a large bowl, combine the flour, salt (if using), and 1.5 tablespoons of melted ghee. Rub with your fingertips until it resembles coarse breadcrumbs. Gradually pour in the warm water, mixing until a shaggy dough forms.
2. Knead to Perfection: Transfer the dough to a clean surface and knead for about 8 minutes until it’s silky smooth and pliable. If it’s too sticky, add a pinch of flour; if too dry, add a few drops of water.
3. Rest the Dough: Shape the dough into a ball, cover with a damp cloth or an inverted bowl, and let it rest for at least 30 minutes, or up to 3 hours. This step is crucial for soft phulkas!
4. Portion and Roll: After resting, briefly knead the dough again. Divide it into 10-12 equal portions and roll each into a smooth ball. Keep them covered with a damp cloth to prevent them from drying out.
5. Shape the Phulkas: Take one ball, flatten it, and lightly dip it in dusting flour. On a clean surface, roll it out into a very thin, even circle about 8-10 inches in diameter. Use minimal dusting flour to prevent the phulka from becoming dry.
6. Cook on the Griddle (Tawa): Heat a tawa or griddle over medium heat. Slap the rolled dough between your palms to remove excess flour and place it on the hot tawa. Cook for about 30-45 seconds until small bubbles appear on the surface.
7. Flip and Cook: Flip the phulka and cook the other side for another 30 seconds. You’ll see small brown spots appear.
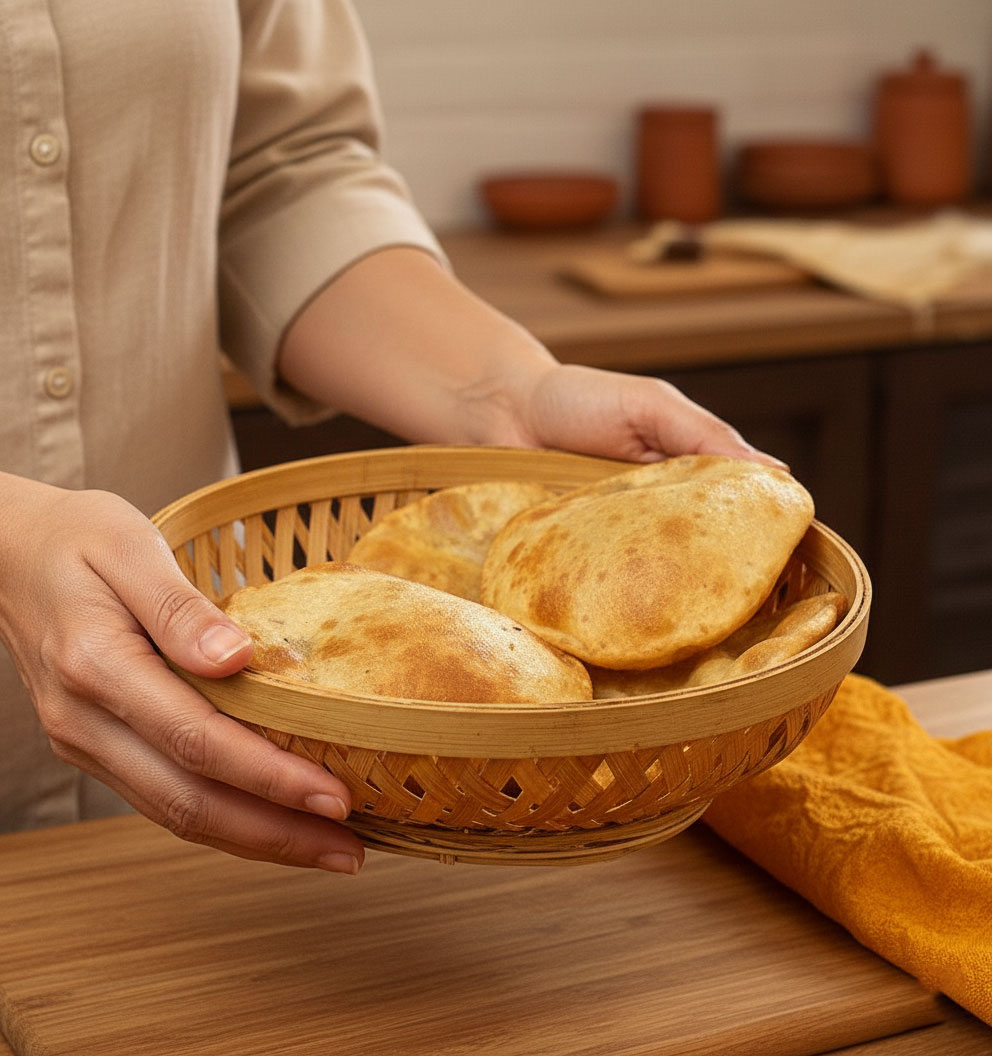
8. Puff Over an Open Flame: Using tongs, carefully remove the phulka from the tawa and place it directly over a high gas flame. In seconds, it will magically puff up into a balloon! Flip it once to cook evenly for another 5-10 seconds.
9. Serve and Store: Immediately transfer the hot phulka to a cloth-lined container. Brush with a little ghee or butter if desired. This keeps them warm and soft. Repeat with the remaining dough balls.
Nutritional Information
• Serving Size: 1 phulka
• Calories: 95 kcal
• Carbohydrates: 17 g
• Protein: 3 g
• Fat: 2 g
• Please note this is an estimate and can vary based on used.
Pro Tips
• for Perfect Phulkas
• The dough should be soft and pliable, not stiff. It should feel like a soft earlobe. Adjust water or flour as needed to get the right consistency.
• Don’t skip the resting time! Letting the dough rest allows the gluten to relax, making the phulkas much easier to roll out thinly and ensuring they are soft.
• Roll evenly from the center outwards, rotating the dough frequently. An evenly rolled phulka is the key to getting it to puff up perfectly.
• Maintain a consistent medium-high heat on your tawa (griddle). If it’s too hot, the phulka will burn; if it’s not hot enough, it won’t cook properly and may become hard.
FAQ
Q: Can I make this phulka recipe vegan
A: Yes, absolutely! To make this phulka recipe vegan, simply substitute the dairy ghee or butter with a plant-based alternative. You can use melted vegan butter, coconut oil, or any neutral-flavored vegetable oil for both the dough and for brushing on the finished phulkas.
Q: How do I store leftover phulkas to keep them soft
A: To keep your vegetarian phulkas soft, let them cool completely after cooking. Then, stack them and wrap them tightly in a clean kitchen towel or aluminum foil. Store them in an airtight container at room temperature for up to 24 hours or in the refrigerator for 2-3 days.
Q: Is phulka a good source of vegetarian protein
A: Phulka, made from whole wheat flour (atta), provides a good base of plant-based protein, with about 3 grams per serving. To create a complete protein meal, pair your soft phulkas with protein-rich vegetarian dishes like lentil dal, chickpea curry (chana masala), or bean sabzi.
Q: Can I make this recipe gluten-free
A: Traditional phulka relies on the gluten in whole wheat flour (atta) to create its signature soft, pliable texture and puff. While you can experiment with gluten-free flour blends designed for flatbreads, the texture and puff will be significantly different and the dough will be harder to roll thinly.